My blog about my wargaming activities. I collect a lot of 15mm miniatures for the American War of Independence and so collect a lot of rules for this period. I started miniatures with Napoleonics, so I have a number of armies in 6mm and 15mm figures for skirmishing. I have15mm WW II figures that I use for Flames of War, Memoir '44, and someday, Poor Bloody Infantry. Finally there is my on-again, off-again relationship with paper soldiers that I sometimes write about.

Monday, December 04, 2017

Richard Borg's Abaddon Deeply Discounted

I did a review of Richard Borg's Abaddon way back in December 2012. Amazon is now selling that game at a deeply discounted rate of $16.99. Because the seller is Prime, that means Prime members can get a copy with free shipping in two days.

If you like mechas you might like the miniatures. If so, this is a pretty good price. As for the game, well I rated it pretty well.

RatingScore (out of 5)
Drama
3
Uncertainty
4
Engaging
5
Unobtrusiveness
4
Heads-Up
5
Appropriately Flavored
4
Scalable
3
Lacks Fiddly Geometry
5
Tournament Tight™ Rules
4
Solo Suitability
2

Of course, such a deeply discounted prices means that Toy Vault is unlikely to make any more expansions for this product. If they sell it, it will probably end up like Battlelore and change. So if you are going to buy it, go with the mindset that this is the last of the line.

Thursday, March 02, 2017

Third Time's the Charm

Twice I started to write a post and twice I threw them away because they did not feel right. If you are reading this then the third time's the charm.

Guilford Courthouse

I have played the Guilford Courthouse scenario from the Rebellion supplement of Black Powder twice now and it continues to stymie game play. The victory conditions in that scenario require the British to break more American 'key' brigades than they have by the end of the game. The only key brigades for the Americans are the two Continental brigades (Williams and Huger) – which is appropriate – while the British have three key brigades (i.e. all of the British brigades). What this means in game terms is that the American militia brigades (Eaton, Butler, Lawson, and Stevens) are 'speed bumps'. Any losses on these brigades have no effect on American victory conditions.

Guilford Courthouse map from Rebellion
So the goal of the British is to carve through the first two American lines while taking a minimum of losses.

For the Americans, there are three basic strategies:
  1. Let each American line take on the British one at a time, inflicting as much damage as possible, but delaying the collapse of each line as long as possible. (This is what Greene did historically.)
  2. Rush the American second line (Lawson and Stevens) to the forward woods line before the first line collapses, denying the British a toehold into the woods before it engages the American second line.
  3. Rush the American second and third lines to the woods, ensuring that the American always maintain numerical and firepower superiority at the point of contact.
The first time I played the scenario (as the Americans), I used strategy #1. The result was that Leslie's brigade stalled at the fence line on the right, O'Hara's brigade broke through in the center but stalled at the woodline after destroying Eaton's and Lawson's brigades, and Webster's brigade pushed back the left flank skirmishers (while helping to destroy Eaton's brigade) and made it to the far edge of the woodline when the Continental brigades pounced and destroyed a British regiment, sending them reeling back into the woods. We called the game on time, but the Americans clearly had the upper hand.

There were a number of rules that we got wrong – I still have not completely re-read the Black Powder rules despite playing three games in the last two months – the most prominent being that it is much harder to inflict hits on units in the woods.

The second time we played the scenario the group decided to punish me for the last game so everyone was British, except me. I was the sole American player. This time I wanted to try and bring the game to a conclusion, even if it meant losing. Given that only breaking Huger's or Williams' brigades will risk an American defeat, if you hold them back the entire game, you cannot lose, you can only draw (at worst). This time I went for strategy #3, which would put my precious Continentals at risk, but would bring a large amount of American firepower to bear early in the game.

Leslie's brigade again stalled the entire game, not least because the first order rolled was a 'Blunder', resulting in the Hessian regiment retreating off of the board when Lee's Legion looked at them cross-eyed. (Such are the wildly random results that make up a Black Powder game.) Despite the British Legion cavalry being committed to the right flank to counter Lee's cavalry, Leslie's brigade barely made it to the fenceline by the time we called the game.

O'Hara's brigade deployed to both sides of the road early in the game, unlike the first time, and it looked like sending the Grenadier Guards against Butler's brigade would help rout them early. However, there is a quirk with one scenario rule that I do not think the scenario author anticipated nor intended. The NC militia (Eaton's and Butler's brigades) get to claim the fenceline as a "position" which they defend. There is an obscure rule with regards to brigades breaking and 'defensible positions'. If a brigade breaks from too many units being in Shaken status or being lost, it must automatically retire one move if at the beginning of its turn it finds itself within 12" of an enemy unit. One of the exceptions, however, is if the unit is in a defensible position it is not forced to retire and may stay in place. This means that the NC militia, as long as they stay on the fenceline, they will not retire unless they explicitly fail a Break Test.

So, what is the math behind a Break Test? For infantry, you can pass a Break Test caused from shooting if you roll a '6' or better on 2D6, or a '7' or better on 2D6 if the test was caused from hand-to-hand combat results. There are modifiers, mostly from taking hits or being Disordered, which make the roll much harder. The problem is, that if you make those rolls you can get some pretty spectacular results, like your NC militia brigade routing the British Guard Grenadiers after fighting them to a standstill for three turns in hand-to-hand combat! (The British players at that point were threatening to beat me up and melt my dice because of all my hot rolling.)

By rushing forward both the second and third lines the Americans were able to bring their massive firepower into play, such that Huger's brigade was almost to the fenceline by game's end and Williams' brigade was engaged in hand-to-hand combat with a weakened Guard regiment from O'Hara's brigade in the center.

Again, technically a draw, but clearly had we kept playing the Americans would likely have won a victory.

So what went wrong? Were the stats for the American troops too high in quality? Is the scenario poorly written? Actually, the American troop quality is pretty poor, more than I would have inflicted upon them. Further, the British are practically Supermen, in terms of Black Powder. They are Elite, so they can shake off disorder without losing a turn. They are Steady so they automatically pass the first Break Test. They have a higher than average Stamina, so they last longer before they even need to take a Break Test. They are Ferocious, so they get to reroll their hand-to-hand combat rolls that miss. They are practically 'Gods of War'. The only thing the two Continental Veteran regiments are better at are shooting, and that is only marginally so. The main issue is that the British infantry save from a hit on a 3+ on 1D6, 2+ if they are in woods. So it is very hard to inflict hits on the British. Combine that with an increased number of hits required before it must take a Break Test and it automatically passing the first such Break Test and you have a game where the British do not actually have to roll until you are deep into a game. Conversely, most American units count as Wavering, which means they must roll for a Break Test every time they take a hit.

As for the scenario victory conditions, are think they are actually well thought out. The Americans did not care about militia losses, so allowing the Americans to ignore those brigades breaking is something that many rules fail to recognize (hint: this is an issue with the Guilford Courthouse scenario in Clash for a Continent and Hold the Line). If there is an issue it is that there is one British brigade, Leslie's, that is particularly vulnerable. But that was historical.

The only other issue is the scenario special rule for the NC militia, indicated above. We have decided that if we ever play this scenario again – and I think most people are frustrated by this scenario – we will probably not allow the fences to be considered a 'defensible position' for purposes of the Brigade Break rule. It makes the NC militia way too hard. Without that rule, unless a NC militia regiment, unless locked into hand-to-hand combat, it will automatically retire one move each turn if it is within 12" of an enemy unit. Given that visibility in the woods (most of the board) is 12", this essentially means the NC militia will no longer be in the firefight once their brigade breaks, unless the British charge them.

But these issues were not what made the scenario break. Quite simply, the core command and control mechanics of the Black Powder rules favor a static defense. It is way too easy to flub a command roll and have it throw off your well-laid plans. Now before you go saying "but isn't that historical?" we are not talking about whether chaos exists in a battle, but whether these rules have the appropriate probabilities assigned to account for that chaos. I say "no".

The one issue that I also don't like about the Black Powder rules is that I believe their hit and save probabilities are wrong. The basic chance to inflict a hit with shooting is 50%. You generally roll 3D6 with a standard unit and hit on a 4+. It is very common for that chance to be reduced to a 5+ (33%) and the best you can do is a 3+ (67%). The chance to save from that hit for a standard unit, however, is 50%. That chance rarely goes down, except when hit by artillery fire, but often goes up, such as when the unit is in cover. Further, elite units often have a better save. In the Guilford Courthouse scenario it was very common to require a 4+ or 5+ to hit, but to save the hit the rolls would often be 2+. There is just something fundamentally wrong with your game system when the chance to save from a hit is frequently twice the chance to inflict the hit in the first place. This makes for grueling, frustrating games in which you are essentially looking for a '6' on a hit to stand some chance of actually causing some sort of effect on the enemy that you might exploit. It is this math, which is part of the core mechanics, which make this scenario especially problematic. This scenario is rated for 24 turns, which is unusually long for Black Powder games. For example, in the two scenarios we played, which lasted four hours each, we got maybe 7-10 turns in. This scenario is meant to be played slowly and really requires that you keep the game setup, which is highly ironic given that the historical battle lasted 90 minutes.

So, why do I play Black Powder when I think it is flawed mathematically? Because other people are playing it...

By the way, if you want to see the pictures of the game, both times put on by Leo Barron, you can see them on the Facebook group "Awi Historicals". Sorry, but you have to be a member of Facebook to see them and you have to join the group as it is private. It is a good group though. 
One of the Kickstarters that I got into, that I really did not talk about much, was the Arcadia Quest (AQ)campaign by Cool Minis or Not (CMON). You can find AQ all over the place now, with items for sale on eBay, in hobby shops, and on Amazon.


I bought this game, some extra characters, the extra campaign (Beyond the Grave) and yet never played it. Cool minis in the Chibi style though.


I read the rules and although they looked interesting, they did not really stick in my head. For one reason or another, every time I sat down to give them a try I had to re-read the rules and something happened that stopped me from being able to give them a try.


Well, then out came the Kickstarter campaign for Arcadia Quest – Inferno. I had a feeling I would like AQ once I tried it, so I could not let that campaign slip away, so I bought that too.


That came in and hell, I did not even crack the plastic until a few days ago. More cool minis.


Finally, there was a Kickstarter campaign for Arcadia Quest – Masmorra, which has the same sort of cool minis.


I have cracked the plastic, but when I realized the rules were not the same as the other two – it turns out that it is a dice-driven, dungeon explorer game – I set the game aside. I still had AQ to learn!


Well, in one of those rare moments, my wife offered to play me in a game again. I thought, why not try this (finally)? It might be more up her alley than a military wargame (although she has never complained about them, nor really even cared about the subject matter).

I decided to learn the rules for a third time and actually play out a game solo before playing it with her. That way only one of us would be wondering what the hell was going on.

The backstory for AQ is that humans came along and disrupted the world for the elves and the orcs. After building a great city, Arcadia, the people created and joined adventuring guilds in search of glory and gold. The orcs, led by a vampire, decided to lure the guilds away from Arcadia by filling dungeons full of goodies (sounds like a future expansion...), and once they succeeded they sprung their trap, and attacked and conquered Arcadia. The game is all about the guild members returning to the monster-infested city in an attempt to retake the city while gaining glory and gold for their guilds. The only problem is that the guilds are not completely cooperative.

Each boxed set is an entire campaign with a full narrative. You need AQ as it contains the core rules, but the expansions have new characters, monsters, rules, boards, and scenarios. The idea is to select your characters (three heroes), equip them, and play the scenarios in sequence, collecting gold and treasure, upgrading your heroes and their equipment while rising in level, penetrating deeping into the core of the city.

The board setup is pretty involved, but pretty straightforward. There are plenty of tokens in play, so organizing your table is necessary. You are not going to play this on a 3' square space.

Like most board games distances are regulated by a grid, a square grid in this case. Players reference cards for each of their heroes, each of which list all of the critical stats and special rules. There are also reference cards for each of the monsters.

Basically each hero and monster has a movement speed, hit points, and defense. Monsters have an attack rating also while heroes' attack ratings are defined by equipment, spells, and weapons, which can also modify their defense rating.

Attacks are conducted by rolling the black dice. Each black die has two faces with a Sword, one face with a Bow, one face with a Critical, and two faces that are blank. Your attack rating determines the number of black dice you roll and whether you are looking for Swords or Bows as hits. (Swords are for melee, which means you are in the same or adjacent square to the target, while Bows have unlimited range, but are restricted by line of sight.) Criticals not only provide a hit for either melee or ranged combat, but they further allow you to roll an additional die. If that die gets a Critical it allows an additional die, and so on, i.e. it is an 'exploding die' mechanism.

The defender, in turn, rolls one white die equal to their defense rating. There is one Shield face, one Critical face, and four blank faces. The Shields each cancel one hit. The Criticals also cancel a hit, but like the Critical on the black die, it is an exploding die, so you get to roll an additional die for each Critical.

Very basic and easy to play. All of the combat results are in the dice (love it!) and all of the special rules are on the reference cards in front of you.

Victory conditions are defined in the scenario and generally indicate a number of quests that need to be completed by a player before they can claim victory. Typical quests are to obtain a token on the map (usually guard by a monster), kill X number of monsters, and kill a hero from another guild (another player's hero). So the game is both Player versus Environment (PvE) and Player versus Player (PvP).

After the first player achieves victory, the scenario is over. At that point you turn in the treasure tokens you collected and spend the gold coins you received for killing monsters and completing quests. There is a system of dealing out reward cards that allow you to purchase new upgrades and equipment so that the next scenario you play, you will have more options available to you.

The rules require a little bit of rules reference, at least until you get a little more familiar with the tokens and what they mean, but combat is quickly picked up and completely heads up, i.e. your nose is not stuck in the rules. You will definitely be reading through the between-scenario rules unless you play a lot and frequently. But if you are like me, playing maybe once every one or two weeks, you will likely need a refresher on that section of the rules after each game.

Because this is basically played as a campaign, and not as single, unconnected games, you start to build a narrative with the game, which is the whole point. My goal is to work through all of the scenarios from all of the expansions with the wife. I anticipate that it will be great fun.

Replayability is pretty high because not only do you have a lot of heroes to try (each player only uses three heroes throughout the campaign), but there are multiple scenario paths during the campaign. Add to that there is the randomness of reward card draws, curses from dying, and so on, resulting in a lot of game play before this looks tiring.

I look forward to playing the campaigns and hopefully I can convince the wife to paint the miniatures with me.

Saturday, February 18, 2017

6mm Figures Are In

I haven't been touting it much lately, but I have been getting a lot of my 6mm troops, especially Napoleonics, ready for battle. Some of it is rebasing old troops [sigh] and some of it is unpacking from a painter I commission.

Now I usually go on about how easy 6mm figures are to paint, but let's just say that my buying got way ahead of my painting. Way too many auctions with people selling off unpainted and partially painted armies. Actually, I picked up quite a few painted troops too.

I have been using a painter from Flint, MI named Mike Crowley, and I have to say his painting talents of the small guys is pretty good. He is also pretty fast too. All of the figures depicted here are painted by him.

All figures depicted are Baccus 6mm, unless otherwise noted.

Napoleonics

British

First up are the Scots Greys that I received last night (which is why they are not based yet). The belts, bearskin cords and reins and really fine and precise. They are the last regiment that I needed painted for the Union Brigade.


Baccus started resculpting his British line and I have really like his newer sculpts over the older ones, so I needed to check them out. I specifically like the 'skirmisher' troops as a line unit that is in a firing line. So, I decided to buy some of the new Highlanders and see how they painted up. I like them. I need to touch them up because the painter thought that I was using them as the light company, so all of the plumes are green!


French

Peter of Baccus 6mm had for a long time said that he did not want to sculpt 'specialty' figures like British Scots Greys, Russian Pavlov Grenadiers, and such because each customer would, at most, buy one or two packs. He finally broke down and sculpted them and he was right, at least with me. I only bought one pack of Scots Greys and because the rules I am using only requires nine figures for a regiment, that left 36 figures to use for something else.

One regiment that has a similar uniform (especially at this scale) are the French Gendarme d'Elite.


I think they look pretty good as that unit! (That is what we call a 'paint conversion'.)


Austrians

I have quite a number of Austrian and Hungarian line infantry, a lesser number of Grenadiers and Grenzers, and no Jagers in Korsehut. Until now, that is.


Although your first reaction may be that the collar and cuffs are too prominent (in color and size), you have to realize that details have to 'pop' at this scale.

Spanish

I had a really good 6mm painter in the UK, who unfortunately I cannot remember the name of, but he had a hiccup in his business so I (unfortunately) stopped using him. But his Spanish figures were really lovely troops. Although I received quite a number of line infantry, grenadier, artillery and dragoon units, none of my hussars or heavy cavalry had been painted. So I finally sent them off and Mark has done an outstanding job. The piping on the hussars are just insane.


Russians

For a long time my Russians have had no leadership. Finally I have some Generals to lead them.


Franco-Prussian War

French

I have two regiments of French Zouaves painted now.


This will be my second regiment of French Algerian Tirailleurs painted up. (I painted the first one.)


Finally, some French Ligne regiments in greatcoat.


Prussians

First off, the mainstay of the Prussian army, Prussian Grenadier regiments.


Unfortunately the Prussian Jagers were moving, so their photo is a little blurry.


Bavarian artillery crews with a Krupp steel gun.


Some Prussian and German Allied Generals.


And finally, two regiments of Prussian Hussars.


Basing

Currently I am basing my Napoleonic infantry with eight figures (two strips in two ranks) on a 1" by 1/2" wooden base 3 mm thick and with a magnetic bottom. Three such bases make up a battalion. This is pretty standard for Polemos basing, except that I am using 25 mm (1") for the frontage of each strip rather than 20 mm.

For cavalry I was initially basing them as three bases of three figures each, but they look very sparse at that density, despite that being standard Polemos density. I think I am going to go with four figures per base with two bases representing two squadrons and four bases representing a regiment. This means that all of the cavalry I have had painted up so far has to be doubled in size. I probably should have thought about that before sending off my last order... I dislike basing.

Cavalry bases are 1" by 3/4", 3 mm thick wood, with a magnetic bottom.

Artillery is based on 1" by 1", 3 mm thick wooden bases with magnetic bottoms. There are four gunners and one gun on the base. If I have limbers, they are on a separate 1" square base.

Commanders are mounted on 1" wooden round bases, with a magnetic bottom. They have multiple figures on the base if they are the Commander-in-Chief and only one figure if they are a Commander.

Rules

For using these figures, I will more than likely use Tin Soldiers in Action for the Napoleonics troops. They are currently organized with three bases of eight figures each for infantry, but I would likely use four such units to represent a 12 tin soldier unit.

Cavalry Brigades in Tin Soldiers in Action would be eight bases (an inefficient number for morale purposes) to twelve bases depending upon whether it contains two or three regiments.

As I am playing more Black Powder (as that is what is played around here by others), I could also use the above as one three-base infantry unit (or two two-base cavalry units) equals one Black Powder unit played at half-scale. 


For the Franco-Prussian War I will probably still use Neil Thomas' Wargaming Nineteenth Century Europe, on a grid of course.

Monday, January 30, 2017

A Rebuttal to My Opinion of the Rules About Bonaparte

I wrote a 'rules read-through' on the rules About Bonaparte (AB) and it achieved exactly the opposite of what I was hoping for. I wanted to give people an idea of what the rules were like without it actually being a review. You know what a review of mine looks like: it has ratings of 1 to 5 for various factors that I consider important.

I was approached by author of another set of rules, soliciting for an analysis and review (unpaid, of course), and after reading them I refused. I told the author I did not like the level of complexity in his rules. Had they hit me up when I was 20, I would have probably loved his rules, but not now. A review by me would have come out negative no matter how hard I tried and so I would not do the review as it would not have been fair to him. The rules were not bad, just not my cup of tea.

Well, intent does not always count. Some saw the AB post as a review, and a negative one at that. To my mind I have only written two negative reviews on rules. One, actually started as a particularly glowing review ... until I played it. After a conversation in email with the author, I knew I was never going to be able to translate what he was saying onto the tabletop. Some rules are just too hard to play without the author being there to help you over the rough spots. The other, well, let's just say that when I am excited about the sound of a product, spend a fair bit of money, wait a long time for that product, and then it breaks my heart, well maybe I am bad at being a spurned wargamer.

I admit, the single factor that irritated me regarding AB was the shoddy printing. That is on the printer for producing the poor quality and the publisher, and the bookseller (who happens to own the publisher) for accepting such poor quality and then turning around and selling a product that they had to have known would fall apart. Trust me, I have not read my copy of AB more than once and it already has sheets falling out.

After having emailed the author of Tin Soldiers in Action – which is another offering from Caliver Books, and published by Partizan Press – several times I have been made aware that the duties I thought were done by the publisher appears to have shifted. In other words, authors are now largely becoming responsible for translations and editing, not the publishers. Wow, have the times changed. So my comments about poor translation and editing was not an indictment solely on the publisher, but upon the author and his team. (I still think the publisher should have a strong role as the product is being put out under their banner.) I still stand by my statement that I could not always determine what the author meant, and could cite some examples, but I have no intention of going through that exercise again. The production quality and the translations are what I termed the "ugly" and the "bad", respectively. I labeled the rest as the "good". However, one reader took exception to my characterization. Massimo Mannari in a comment said:
Hi Dale,

I am the the translator for Italy of About Bonaparte and I have some doubts about your review. The truth is that even your "good" looks "bad" in your words and that, with all the references to other wargames, you accuse AB of being [copied from] other games that also appear very different as a starting point. We speak of a wargame with a free battlefield and of battalion of Toy soldiers in 54mm. A scale not so simple to use in wargame. Again, you find the complicated game system, when this system allows the best use of the units, the movement, the shot, the morale and the choice of those who move simply rolling the dice. You don't remember like rolling dice are [not] so simple, the Flag seems, from your description, incredibly easy to obtain, as well as obtain two or more. It is not so. For the Caliver edition, for many things I could say that you are right, but I have seen many [rules] and, at the same price, they offered [bad] graphics and [are] simple black and white. So to end, I think you're just discouraged those who could be interested in the game, finding similarities with products with other features and different starting points, a result that transcends your same considerations.

Thanks for your space,

Massimo
So not everyone agrees with my characterization that the rest was shared in a good light. Nonetheless, I offered Massimo the opportunity to write a rebuttal, with the promise that I would publish it on my blog in his words. My guess is that he contacted the author of AB as that was the email I received next.
Hi Dale,

I want to thank you for the review of About Bonaparte. Happy to see someone has taken time to do so. First: sorry if my English isn’t perfect, my native language being Dutch (Flemish) , so if I typed mistakes I’m sorry for that.

Maybe, for better understanding , I’ll start by telling a bit more than in the article how About Bonaparte grew.

My first contact with wargames dates from the end of the 90s. As you know, I am a 54mm collector. My first contact were Fire and Fury and variants from Belgian clubs, and I started to make an Austrian army in 54mm, Patrick going for the French, to use with these rules.

Somewhere in around the year 2000 another 54mm collector invited us to for a new board game he was enthusiastic about. It was Battlecry. And indeed I was immediately a big fan. I immediately tried to recreate it on my table tennis table, with white dots being the centre of a hex. The Austrians had their first battles. (when I made the first dice painting normal dice, I was forgotten there were the crossed sabres on the sixth side. Really. I did buy a Battlecry game afterwards when but by then we were used to wargame with our own version )

Then first thing I changed however was the melee: now in a charge, both sides could throw dice. I did find it logical the defender could also throw dice. In Battlecry, a unit that has suffered losses keeps his number of dice. It was strange too from a wargamer point of view, so we changed that too.

You know, every change I did add was due to logic. In those first battles, we had an hussar unit that charged the French Old Guard unit, and breaking it. Our friend Adrien, was furious. This is one thing that could never happen. Also, the game table, without scenery , after a few games, started to be annoying and it wasn’t that simple to insert scenery pieces with the dots. Also, formations were so important in the Napoleonic period they had to be introduced. The hex system had to go. But that also applied for the use of cards as you do not longer have a clear centre, and wings. Had a bit to think on that but you know what the solution was. I do indeed not make a difference in moral and abilities of the individual command figure (why make things complicated), but that can be adjusted by the number of aides.

So the use of dice for command also is in my eyes a very good solution. Letting an order been given to groups also.

I did read a lot of books and battle reports on the Napoleonic period, and I tried to what was important on the battlefield being reflect in the rule with adjustments. So indeed the doubling of flags. A cavalry charge has it: both for the attacker as the defender. Why: the impact on moral of seeing hundreds of cavalry charging towards you : units will break faster. On the other hand, cavalry is harder to control by its officers, and with a failed charge will also have the possibility to flee faster.

Is that logical? Think so. It also influences you as a player, just in was for historical commands: using your cavalry is a gamble, and certainly against fresh troops at the start of the battle not a good idea. Better use them as a kind of fast reserves . Now skirmishers: +1D to shoot, -2D when you shoot a them. Why? First of all, skirmishers are picked men, the best shooters , better weapons so yes a +1D. So now the -2D , how do they fight: they use cover and fight in an open formation, and when they see a line aiming at the for a volley, well they duck. If you only look at the firing they indeed look supermen. So what makes skirmishers vulnerable : close combat. That’s why they have a minus in close combat and they opponent a +1D. Against cavalry it is even more. They can try to evade. In the rulebook, the test stand by stand, as I had seen in another rule. But it makes the game complicated with the unit sometimes split, so recent games we test the whole unit at once. Chances to evade infantry are greater than against cavalry.

So yes, you must be careful where to use your skirmish troops., as indeed was the case in Napoleonic battles. Concerning support. It was obvious already from the beginning still using the dots on the table, that there is a difference between two units against each other and a unit facing two or three opponents. We did play a lot in those days, and tested many versions, and the simplest one if in the rulebook.

By 2003 the rule was how we play it still now, but was only the modifiers a few sheets of paper. Beginning of 2005 we did our first game at a convention in Ghent, and in November 2005 we did Austerlitz at the Crisis convention in Antwerp. http://www.hat.com/Othr8/Donvil86P.html Some club member that are used to more complex games asked to add other changes in the rulebook, but what wasn’t logical and didn’t matter according to historical accounts had no chance.

I have made other games before becoming a wargamer, so I know, less is more. As Our club has grown over the years, I think the rule makes sense.

Ow yes, concerning defensive fire, offensive fire , I have played a few times with a rule that hat, moral before the charge, defensive firing, moral test for the attacker, offensive fire, moral test for the defender, the fight, consulting a complex table, moral test for the looser. It takes hours to finish one turn. In AB all that is concentrated in one dice throw. Can’t be more simple.

I haven’t seen C and C rules yet, but as I understand, it has also changes compared to Battlecry close to what we have done. So it seems Richard Borg had seen the same logical things we did. If you want to make a Napoleonic game with some realism starting from Battlecry , I ‘m sure you will have to add the same changes to reach that result. In the end, most Napoleonic war games on battalion size units must have comparable mechanisms or else they fail.

When I started to think about putting the game we played into a rule back into 2007 , I first called it IIAC, referring to the dice.

Here under the mail I did send to Dave of Caliver Books back into 2009. I took Caliver 3 years to finalise the project. And yes I think I made a mistake in that mail as it seems Battlecry dates from 2000.

This is my first mail of 2009 to Caliver

From: dirk donvil [email address deleted]
Date: 2009/2/15
Subject: IIAC - request for publishing
To: ask@caliverbooks.com

Hi Dave,

The last decade has seen an incredible growth of Napoleonic and AWI figures in 54mm. Italeri, Armies in Plastic, CTS, Barzso, Conté, A call To Arms, etc. have created a wide variety of figures, and now Hät has also announced even Wurtenbergers and Bavarians.

So what seemed impossible 10 years ago due to lack of figures has now become an opportunity : wargaming in 54mm.

In annexe you'll find the beta version of my 54mm Napoleonic Wargame rule. I started in 1999 creating the rule and after all those years writing, rewriting and playing it has resulted in the IIAC rule.

It is a simple fast play rule, different from other rules by the special dices and game mechanism, yet resulting in historical acceptable outcomes and a lot of fun. I have also foreseen the use of other scales.

I 'm also working at an ancients version (simpler in unit formations yet more complex in warrior types), and planning to make an ECW version. The original is in Dutch and I am planning also to make a French version.

You can find some battle reports at the Hät website with these links.
http://www.hat.com/Othr7/Donvil01P.html
http://www.hat.com/Othr7/Donvil04P.html
http://www.hat.com/Othr7/Donvil09P.html
http://www.hat.com/Othr7/Donvil07P.html
http://www.hat.com/Othr8/Donvil12P.html

So you can see publishing this rule is really an opportunity.

Regards
Dirk Donvil
[contact information deleted]

Now complexity. Most old school wargamers I know find my rule to simple, to much a childplay game. So my first thought reading your comment on the rule being too complex, was that you were joking, making fun of the rule as some of the old wargames did. So I’m perplex to see you are serious about it, first time that I did receive that reaction. Suppose it is due to you having CCN in mind . All adaptions are in my eyes pure logic.

In 2008; I made an ancients version(About Caesar). It is more complex than AB. Simply because there are so many troop types having their specific way of fighting. Did compensate it by reducing formation possibilities. Did also change the flag system, and yes it’s a bit complex, but it increases the impact of veteran and elite troops, as historical reports show us. Also made a Renaissance version (https://marstonmoor54mm.blogspot.be/) and a “Lord of The rings” adaptation , the latter not published, only in Dutch, club only).

Quality of the book: [inaccurate statement about printer deleted] I made the book with Word the illustration in Excel, that’s the software I have. (Should I be ashamed of my work?)

The article in MW. Yes I reused the intro of the book. The article tells the same : how the rule came to be. Should I have written a different story? Is it that chocking, did I did something wrong? I don’t see the problem. The editors both at Caliver and at MW both didn’t remove the mistakes from it, sorry, but I can’t do anything about that. If you want to edit it for me, feel free to do so, I will make the changes.

So, finally I would like to challenge you Dale, after reading all this: can you make abstraction of CCN and test AB with a fresh view, and see why it works for is now for 15 years, and why even someone from Holland is driving two hours to participate with our games. I you need dice, I will send you a set. In annex also the AC and ACr, and the annex from the mail to Dave back in 2009. I think all this is a bit long to put in a blog comment, but seen the reactions are really negative, I think about it.

Cheers

Postscript: Concerning the printer discussion. It is obvious Partizan/Caliver has/have released some books with poor quality compared to most of their books. I think you should contact Dave about your concerns. For me, in the whole, is not an issue. What triggered me to react on your comments on AB was what was years of work, playing and testing could be interpreted by readers as a simple copy paste job from CCN. That did … hurt.
By the way, only one part of Dirk's email was deleted (other than removing his personal contact information), and that was because of, I believe, a misunderstanding of what I wrote about the printer in my original blog post. The printer is, in fact, in Malta. My copy of the rules were not printed by Partizan Press. (Nor was my copy of Tin Soldiers in Action, so I suspect that Partizan Press is no longer printing, but only publishing, but I could be wrong.)


I could address Dirk's objections point-by-point, but I won't. I don't want there to be any hint that I am being more negative than I apparently already have. Anything I say will likely be taken as being critical of Dirk's design decisions.

Let's face it folks: we don't all love the same things. We don't always agree on what should be modeled in a game or how it should be modeled. One man's logic is another man's error. If you have read me long enough then you know how I think in terms of simplifying games and removing the details that, to me, do not matter. That said, my commentary can hardly be an accusation of copying and pasting someone else's work. AB was too far off the mark from the original, which turned out to be Richard Borg's Battlecry (1999) rather than Richard Borg's Command and Colors: Napoleonics (2010). (I figured it was not based on the latter, by the way, given that it has not been out that long. I had not figured that it was based on Battlecry as it took out a lot of elements from that set.)

You can see my comparison of Richard Borg's various games in this article that I wrote back in 2011. My devotion to his rules has been for some time. My first article was June of 2010 for the second campaign we had run for Memoir '44, but I had been playing Memoir '44 for at least two years prior to that. I just never thought to blog about it. Which is all to say, I can recognize when I see mechanics similar to Richard Borg's.

But does that mean that if I make a combat system that uses opposed die rolls for combat, adds factors for the attacker and defender, and then use the difference in the rolls to determine the outcome, putting those outcomes in a table that I have ripped off Phil Barker and DBA? No. I noted the similar mechanism to Ganesha Games' Song of engine, but did not call it a rip-off. Because, in the end, it is not the concept of rolling dice and comparing results that matter, but the values that you use to modify the roll and the table that interprets the differences to an outcome.

The same applies to the idea of using the die itself to define the odds. I took that same concept in my articles on bringing Battlelore to the tabletop (Part One and Part Two of the game), or when I decided to try and make a company-level WWII game (see the section on Dice as Chart Replacements). I even published the graphics for those custom dice. I don't consider this a rip-off either as, again, the magic is in the odds, not that you burned the odds into the die. (Just going through my old posts is making me want to revive the system!)

I think if you go back and read what I actually wrote about AB it was not that I accused the author of ripping off Richard Borg, simply that I recognized where the ideas sprang from. I then began documenting point after point of where the author had changed from the original, introducing his own ideas. In the end, however, the author did not see my remarks as being that way. Which is unfortunate, because I am not rendering an apology. I did not make such an accusation. The author thought I was incorrect, or failed to see the logic of his design choices. He is entitled to his opinion. I felt that the least I could do is give him a platform to respond to the very readers he was concerned about that I had wrongly convinced not to buy his rules.

All that said, I make this promise to you, the readers: if you think I have done wrong with a review, let me know. Write a decent argument and I promise I will publish it here.

Saturday, January 07, 2017

When it Comes Down to the Last Roll of the Last Unit on the Last Turn

The last game I played was a scenario called "Hook's Farm", which was adapted by the author of the rules Tin Soldiers in Action (TSIA) from a scenario of the same name in H. G. Wells' book Little Wars. I had built my version of this scenario in order to play it with my gaming buddy, Justo. I live in Arizona (USA) now and he lives in Texas (USA), so we were going to play it over Skype by each of us having a board, miniatures for both sides, and markers. As TSIA is played on a square grid it is very easy to call out the grid number of the unit moving or firing and the grid number where you are moving to or firing at. Sort of like the old Milton Bradley game Battleship.

I was farther along with the miniatures and board, so when Justo missed the first deadline, my wife offered to game with me as we had not gamed together for some time. It was a mercy killing. Although technically she lost, she had beaten the snot out of me and her main attacking force was still intact.

Justo got his miniatures finished and we played a game at the tail end of the New Year's holiday and it was fun. I was attacking that time but ... well, I got smashed again. Really stupid move on my part right at the start and it put me on my back foot for the rest of the game. I got so distracted by that error – and Justo was on the hunt for blood – that our picture taking sort of petered out. That is why there was no battle report.

So, we decided to run the game again last night/this morning with Justo attacking this time. Hopefully this battle report will show more of the subtleties – and dare I say it (because the author of 
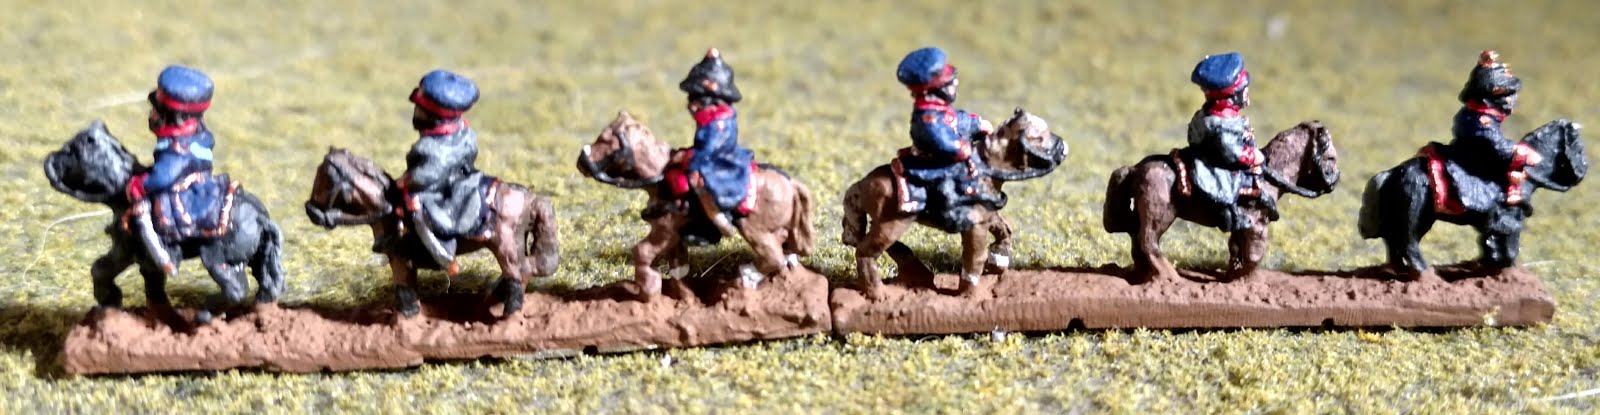
TSIA will read this), some of the peculiarities – of the rules. Also, you will get a double view of each turn! The first picture of each turn will be Justo's version of the game, while the second picture will be mine. Note that he was using American Civil War paper figures (and a cat), while I was using handmade, wooden Austro-Prussian War figures. Note that most of our pictures are end-of-turn shots.
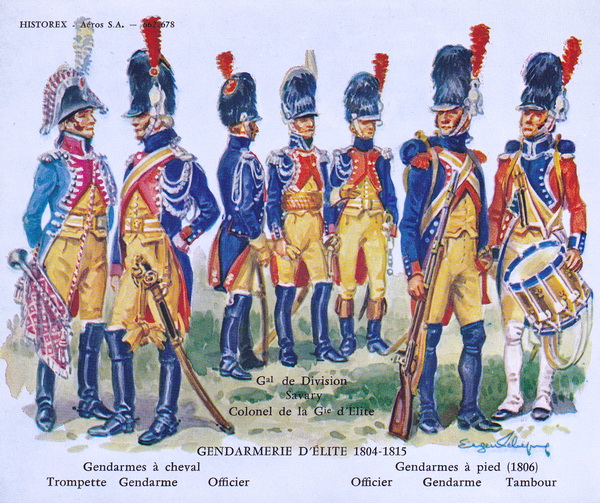
Actually, neither Justo nor I are using the right period figures for the scenario, although Justo's is probably closer to the mark. The scenario has the infantry armed with rifled muskets, so that works for both sides of the ACW and for the Austrians in the Seven Weeks' War, but not for the Prussians, who are using early breechloaders. The artillery in the scenario have smoothbore muzzleloading guns. Again, this still works for the ACW, but due to them being rated as "medium", they are insufficient to be used as 12 pounder Napoleons. Ironically, the Prussians were still using smoothbore artillery, but the Austrians were already using rifled artillery. As for the cavalry, the scenario gives them only close combat weapons and no ranged weapons or revolvers, so they are really not suited for either ACW or the Seven Weeks' War cavalry. Probably the best representative would be armies from the 1850s, such as the Franco-Austrian War of 1859.

The Scenario

You can get a copy of the PDF of the scenario by following the link or searching in the files section of the TSIA board on BoardgameGeek.


The Blue defender can set up their forces anywhere in rows 1 through 3, with a single unit being able to occupy square D4, Hook's Farm. The Red attacker set up their forces in row 8. The objective is to hold Hook's Farm at the end of turn five. The two forces are identical, save that the defender must eliminate one unit of their choice before the start of the game. If a player loses their Commander-in-Chief, they automatically lose (or draw if both players lose them).

The houses rarely come into play, save for Hook's Farm, but the woods have a large spoiling effect on wide sweeping movements. The largest impact is from the two hills.

Hills have several effects on the game. Shooting uphill is penalized, but downhill is not. Close combat attacks are not penalized, either uphill or downhill, but they can affect morale before and after close combat by giving an advantage to an uphill defender. The greatest impact, however, is on line of sight (LOS).

The easiest way to describe the line of sight rules with hills is to compare it to other rules. The closest I can think of is Memoir '44 (M44). Hills are plateaus, not ridgelines. Line of sight from hill square to hill square is unimpaired by all terrain at ground level (elevation 0). However, there are a few peculiarities that may surprise people. Like M44, the 'plateau effect' means that other hills block LOS to the ground level. Looking at the map below, a unit in C4 could see A6, for example, but not B6. The hill in C5 blocks the LOS to the latter. Here is the complete LOS for square C4. Gray squares are not visible.


As you can see, hill squares are actually very restricted in their LOS. Knowing that the defenders start in row 3, on the back edge of the hill, you can see that the entire rows 7 and 8 are out of LOS, allowing the attacker to approach the hill without coming under fire, only being fired upon once they get up onto a hill square. Given that the attacker starts in row 8 they have a fundamental choice to make: move to row 7 on turn 1 and stay out of firing range moving up and firing on turn 2, or move to row 6 on turn 1 and take the fire. If the defender moves first, the latter is the obvious choice, but if the attacker moves first...?

This also means that there are 'power squares', in terms of LOS. For the defender, one would be square C6. That square dominates two directions, plus one-half of the hill.


That is a long way from the defender's start line and a big gamble to take at the game start. But I digress. The point was to show how LOS to and from hill squares work.

Deployment

Only one picture for this, from my game, as Justo's picture did not come through.


The attackers (Prussians, in my case) are at the bottom of the picture in row 8. From left to right: two infantry brigades, a limbered artillery battery, the cavalry reserve with the Commander-in-Chief, another limbered artillery battery, and two more infantry brigades.

The defenders have an infantry brigade defending Hook's Farm, then in row 3 from left to right: an unlimbered artillery battery, two infantry brigades, and a second unlimbered artillery battery. Finally in row two is the cavalry reserve with the Commander-in-Chief.

I am a bit perplexed by Justo's deployment. I was not expecting the cavalry to be directly in front of Hook's Farm. Given that he made a very successful charge early in the last game, I figure that he wants to duplicate that success, so will be aggressive with this cavalry.

I still have not painted the central hill, put the roofs on the houses and am missing two guns and three limbers models from my units. Oh the shame!

Turn One

Justo is taking pictures from the right flank of the defenders/left flank of the attackers. He has advanced his light cavalry (which is in open formation) into the woods on his left flank. (Note that in my picture I have this wrong. I thought he was still behind the woods.) Either way, I reacted by moving my cavalry reserve to defend against a flank sweep.

Justo was unlucky in that he was forced to move his troops first, so he decided to move up to the base of the hill and not expose himself to the full fire of my forces on turn one. Only one infantry brigade exposed themselves and they took a single hit as a consequence.


Note that because Justo took his infantry and cavalry around his left flank, I did not move the artillery battery in C3 forward to C4, where I normally move it. Moving it to C4 would have not only limited me to one shot that turn (although it would have been canister and not round shot), but it would not expose my artillery to fire from the infantry in A6. Not having made that move will have a significant impact the whole game because that artillery battery's fire will not only be reduced in strength (because it will continue firing round shot from long range and not canister), it will be limited in its targets because of the narrow LOS.

Turn Two

The infantry brigade I threw out front into E5 was crushed by the weight of fire coming from Justo's gun line, as was his infantry brigade in C5 from mine. We both ended up pulling our units back. (I took the worst of it though as my unit had lost 50% while Justo's had only lost 25%.)


A second infantry brigade (in D6) of Justo's was badly battered, but he started inflicting hits on my infantry brigade defending Hook's Farm. I decide to gamble a little by moving an infantry brigade into F5 (in front of my battery on the right, which had already fired), but honestly I forget why I did it. If rushing an infantry brigade out front resulted in its slaughter last turn, why would this one not turn out the same?
Now you may wonder why I would make that move. Would it not block the LOS of the artillery battery? Well, actually, no. For those used to LOS rules in US boardgames, this may seem a little peculiar. Unit A has LOS to unit B.


In most US boardgames there are rules that say something like: "LOS on the 45º diagonal (or down the hex spine for hex-grid games) is blocked if there is blocking terrain or a unit on both sides of the line, but is not blocked if there is blocking terrain or a unit on only one side of the line." Not in TSIA. The rule specifically states that "if the line of sight passes through a square containing an obstruction", the LOS is blocked. The key is: "passes through a square". How do you know if a line passes through a square when you are on the 45º diagonal?

I thought about it this way. If I were moving from square A1 to B2 – along the 45º diagonal – would I first move into squares A2 or B1? No. So if I can move directly from A1 to B2 without passing through another square, why would LOS be any different? Turns out I was right. By the way, this only applies to the 45º, 135º, 225º and 315º diagonals. LOS is determined by going from the center of the starting square to the center of the ending square, so if the line is not at one of those four angles you will be passing through another square, which may in turn block the line of sight.
Justo decided to move his cavalry reserve back out of the woods, then close up into close formation. Looks like he is preparing to charge!

Turn Three

My gambit with the infantry brigade is crushed as Justo's forces all get first fire, leaving me with 75% casualties! I retreat to the house on my left flank, never to be useful again. Otherwise, units continue to be whittled down.

Reinforcements! Peanut makes a flank attack!

Justo long considered charging with his cavalry against mine, but after discussing the Axis of Attack rule – which essentially forces a charging unit to charge to its 'front' at the end of their movement – we agreed he could not charge.

This is a legal attack by A. The charge into B (square A3) is within the Axis of Attack after moving into square A2,
Further, when he considered charging my artillery in C3, we went through the odds of that succeeding and again he decided against it. In the end he pulled his unit back into reserve in the center, looking for an opening against a weak unit.

My unit defending Hook's Farm continues to get whittled down, having lost five tin soldiers from the fire of Justo's gun line. Further, there was the sudden appearance of an infantry brigade on its flank. I must do something about that!

Turn Four

This turn and the next is all that remains of the game. My defending unit in Hook's Farm is starting to look really weak. I do not have much time to save them and for some reason I have no fresh reserve infantry brigade to replace them.

Fortunately, my units were able to act before his infantry brigade on the hill could fire, so I pour all fire into that fresh unit, causing it three hits. It passed its morale check, however. I had more luck coming as my cavalry reserves' card was drawn next. After much hemming and hawing, I decide to charge them into the infantry brigade threatening Hook's Farm, mostly to work through a close combat example. (Justo had played a game previously with his son, and he said that he probably messed up that part of the rules.)


This is a fairly good charge as there are no units that can provide supporting fire.
Supporting fire occurs if an enemy unit is adjacent to a charging unit. If so, it can fight in close combat by providing fire into the charging unit before the charge hits home! You do not want to make charges into supported units as you will simply be shot down. Note that supporting fire is taken by units with ranged weapons, but it is played out as close combat, not ranged combat. One big difference is that cavalry no longer gets a defensive modifier.
The infantry get first strike as they have ranged weapons, but they score a measly one hit. With 11 figures remaining and 22 dice for close combat, the light cavalry cut the infantry brigade to ribbons.

The '5' and '6' are hits. All nine infantry are cut down.
This allows me to take a cavalry breakthrough.
In TSIA, cavalry are pretty much fire-and-forget, one-shot weapons, which to my mind is as it should be. A cavalry breakthrough occurs when attacking heavy cavalry simply wins a melee or attacking light cavalry wins the melee by completely wiping out the enemy unit. A cavalry breakthrough allows the cavalry to continue the charge and attack units adjacent to the losing unit.
At first I hem and haw over whether to stand, advance and take the position, or take the cavalry breakthrough. The second option – to advance but not take the breakthrough – makes no sense. To stand means that my cavalry will be blocking my artillery's shot next turn, unless I get lucky enough to move my cavalry before my artillery is commanded to act. To breakthrough, however, means that I will take fire from both an artillery battery and an infantry brigade (albeit one with 50% losses). Justo points out that I will still take the fire if I stand there, laughs and calls me chicken, so I go ahead and take the breakthrough. (Real strategic thinking there, eh?)

But now the issue is: which unit to charge? If I charge the artillery, here is the sequence of events for resolving close combat.
  1. Both sides take a morale test. The artillery cannot fail the test because it is superior, unlimbered, and has an attached commander.
  2. The infantry conducts supporting fire with three dice.
  3. The artillery conducts defensive fire with nine dice.
  4. I conduct my close combat attack with the remaining figures, getting two dice per tin soldier.
  5. If I win, there will be no more units within my axis of attack, so the cavalry breakthrough ends.
If I charge the infantry, here is the sequence of events.
  1. Both sides take a morale test. The infantry will fail 33% of the time. If they fail they will be disordered, halving their dice in combat and making them more susceptible to losses if they lose the combat.
  2. The artillery conducts supporting fire with nine dice.
  3. The infantry conducts defensive fire with three dice, unless they failed morale in which case it will be two dice.
  4. I conduct my close combat attack with the remaining figures, getting two dice per tin soldier.
  5. If I wipe out the infantry, there are additional units within my axis of attack, so the cavalry breakthrough can continue.
Clearly the infantry are the better odds, but the artillery would be a bigger loss to Justo. Justo continues to razz me saying that the only real choice is to continue to kamikaze with the cavalry. I choose to charge the infantry to show him that my cavalry is just as fearless as his were last game!


By the way, I have my Commander-in-Chief with me, so if I lose him, the game is over for me unless I can kill his Commander-in-Chief too!

Justo rolls and whiffs, something like one or two hits. I cut the infantry brigade down and continue on to his second crippled infantry brigade cowering behind the artillery.

Now ponder that for a moment. My cavalry will be charging into a third, half-strength infantry brigade with two artillery batteries firing canister in support. The artillery batteries alone will be firing 18 dice and the infantry six dice (assuming it holds morale, otherwise it would be three), so that it 21-24 dice, needing ...

All of the sudden it dawns on me. I say: "Justo, have you been counting only the '6's as hits or both the '5's and '6's as hits?" He bursts out laughing and then groans. He has been whiffing because he was only counting '6's! I tell him that I don't know how to back out of this and do it over. He tells me not to worry about it, let's keep going. I allow the first artillery battery and the infantry to hit on '4'+ (but the second battery is still '5'+) to somewhat make up as compensation. But his dice went cold and he still whiffs, but at least this time it was legitimate.


That said, the losses are just too much and I lose the combat. I retreat in disorder to the woods, take a single loss to desertion, and lick my wounds.
As it turns out, Justo was right. To not advance and take the breakthrough would have been a waste of the unit. I was going to take all that fire anyway when his cards came up. You pretty much have to view cavalry as one-shot and do as much damage as possible once you decide to commit them. If, in the end, you are allowed to retreat, count your blessings.
Oh, and my Commander-in-Chief survived.


My infantry brigade defending Hook's Farm is down to four tin soldiers. It is looking grim. My cavalry is down to three figures. (I have a yellow marker in my photo instead of an orange, so it is mismarked. Justo has a missing stand in his photo, but I suspect that is the work of Peanut, who has been batting Justo's paper figures around as he takes a paw in the game.)

Turn Five

This is the critical last turn of the game. (We are not playing the optional rule, Variable Ending, which gives the attacker an advantage by letting the game play out as long as seven turns.) It is after midnight for Justo and approaching midnight for me. We are both getting punchy.

Luck continues to be with me. I rotate out the infantry from Hook's Farm and move in my artillery unit. What I have noticed is that the artillery simply do not fail morale rolls. All of my units fire first, so I pour fire into his artillery in an attempt to whittle them down. Each artillerist lost can cut his dice down by as much as three dice per tin soldier.

I fail all of my rolls. I throw the crippled unit in the house (G4) into the fray (at F5) in hopes of blocking a charge by Justo's infantry on the left flank (in G6). It does not work. Justo's cavalry charges and wipes me out, clearing the way.

Justo ends up with the last three cards of the game. Everyone he has that can pours fire into Hook's Farm. I go from four artillerists to two. Justo's last unit moves and charges into Hook's Farm. I have two artillery batteries and one half-strength infantry brigade defending or providing supporting fire. They cut him down from 11 tin soldiers to four. Justo rolls his last attack and scores no hits.


The game is over and I have won.

How close was this game? If the artillery unit in Hook's Farm had lost one more figure, it would have been reduced to one remaining artillerist. In TSIA that means that the unit is removed as the remaining figure runs off. That would have left my Commander-in-Chief holding the Farm.

When a unit commits to charging into a square for close combat and the preceding fire or morale tests causes the defending unit to be destroyed, the charging unit automatically wins the close combat and may advance into the square. The infantry brigade would have avoided all of the supporting fire.

When the infantry brigade reached the square, it would have found a lone Commander-in-Chief. I would have had to roll a die and on a '6', I would have been captured and would have lost automatically. On a '1' through '5' I would have been forced to retreat, leaving him the victory square, and thus also have lost.

Now, I do not like to point out an error of my opponent any more than I like mine being pointed out and published in a blog. But – sorry Justo, this is an important point – if his infantry brigade behind the artillery had moved as indicated with the dashed arrow to square D6 and fired, he could have obtained that last hit. What were the odds? Well, there were four tin soldiers left, firing at one die per two figures, shooting at unlimbered artillery (half dice), so he would have had a single die roll, needing a '6'. Not good odds, but...

Conclusion

Man! What a close game. This was a real nail-biter of a game of TSIA and certainly one of the most intense games of all time for me. To have the game break for one side or the other on the loss of a single figure! You do not see that very often.

Hopefully this will help others understand the TSIA rules a little better and highlight some of the areas where they differ from US and UK rules, especially boardgames (which we usually associate with grids). To be honest, my first reaction to some of the differences of new rules to the old way that I am used to playing is always somewhat negative, because it is not how I cut my teeth on grid-based games. But that is because it is all a bit unfamiliar. I think that the more I dug into Richard Borg and Neil Thomas rules, and how they made the case that simplicity of design does not make the game duller, but actually enhances the experience, the more it allowed me to appreciate these rules.

Justo was pretty clear when he said that these rules have a really clever design to them and that they are clean. I think he has some of the background that I do with "standard boardgame rules" and thus some of it feels counter-intuitive. But as I explained above about the line of sight rules, when you start thinking it through and challenging those old assumptions, the rules are more cohesive and consistent with very few exceptions. As the author RĂ¼diger told me in a chat, given that he stopped buying commercial rules more than ten years ago, he hasn't been corrupted by them and how they all play the same way either.

What's Next?

My next project with these rules will be a skirmish game, although I am not sure when I will get to it. I need to think through some ideas because I think my concept of a skirmish game is a bit different than the author's. It is something more than just "one figure equals one man". It is about scale, about zooming in on the action. It will probably involve bending some TSIA rules...

Blog Archive

Blog and Forum Pages

Popular Posts

Followers

About Me

My photo
Huachuca City, Arizona, United States
I am 58 yrs old now. I bought a house in Huachuca City, AZ working for a software company for the last three years. To while away the hours I like to wargame -- with wooden, lead, and sometimes paper miniatures -- usually solo. Although I am a 'rules junkie', I almost always use rules of my own (I like to build upon others' ideas, but it seems like there is always something "missing" or "wrong").