What it takes to paint (anything) is a steady hand. Until you get your "hand", where it stops trembling and shaking because you are holding it out in an uncommon position, you are not going to be very decent in painting a 28mm figure or a portrait either. But, this article is not about how to steady your hand (only practice can do that), this is about how easy painting a 6mm figure really is.
First, a few notes. Most of the pictures that follow are magnified. The detail you can see much more than the naked eye can really discern. I point that out because painting "defects" look really bad in magnified pictures; the defects are, well, magnified!
I paint under a magnifier lamp, such as these on Amazon. Don't misunderstand: I do not do this because they are 6mm figures; I do not for all figure painting, including my 42mm troops. It is just easier on the eyes because it lights the subject and makes the details pop.

Here is an example of 6mm figures – old Games Workshop Epic figures, to be exact – under magnification. Although it is tempting to paint every little detail you see, some details are so fine that even if you succeed in doing so, in this scale it will not be visible to the naked eye. For example, you could paint the eye sockets of the Space Marine red, to show the lenses in the armor, but the dots would be so small that it would be unnoticeable, except under magnification. Avoid that temptation. What you want to focus on are those details large enough that you can see then when painted, and that your brush can easily get to them.
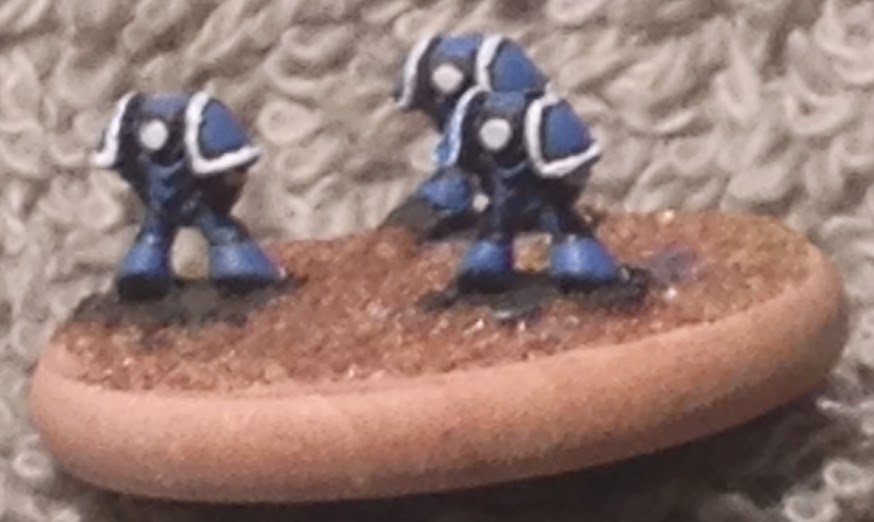
Here I have mounted three figures to a base, primed them, and laid down a layer of light brown sand to the base using white (PVC) glue. I used to prime all of my figures in black, but I have started moving away from that practice. In this example, I used a dark gray, but later experiments showed that a dark navy blue was even better. The idea is to prime using a darker version of the major color. We are going to use that primer color as a separator between other colors to help make them pop.
Here I have mounted three figures to a base, primed them, and laid down a layer of light brown sand to the base using white (PVC) glue. I used to prime all of my figures in black, but I have started moving away from that practice. In this example, I used a dark gray, but later experiments showed that a dark navy blue was even better. The idea is to prime using a darker version of the major color. We are going to use that primer color as a separator between other colors to help make them pop.

For painting a figure like this you want a brush sized 20/0. That is pretty small, but then again, so is the figure. Larger brushes, even with very sharp points, load too much paint, so there is a chance you will apply too much paint to the surface. I use the Army Painter Wargamer Brush: Insane Detail brush. This brush is expensive, but can serve as both a spotter and liner brush.
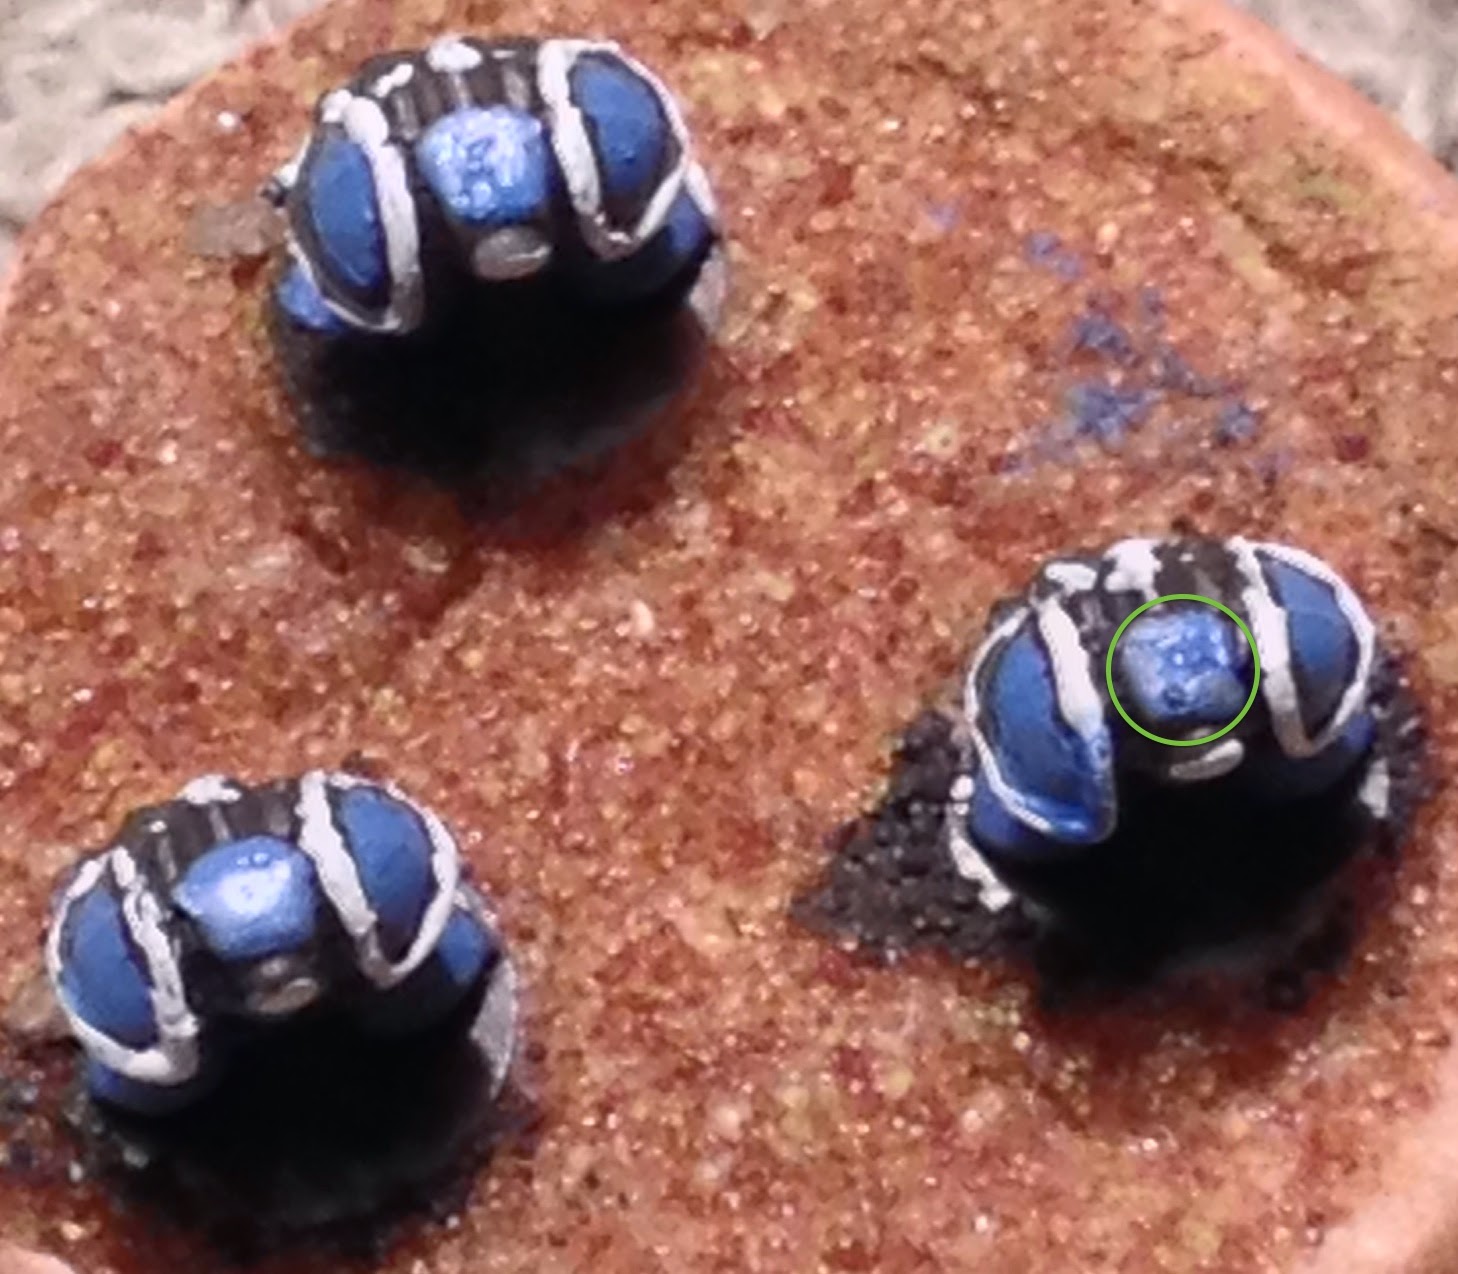
So, what's a spotter brush? It is a brush for making "spots" with paint, so the tip will not be "mushy". You make a spot by putting paint on the tip, moving the point of the brush straight onto the area where the paint it to be applied and press gently. Because the tip is firm, the spot should not be much larger than the tip of the brush.
Here I have applied two spots of white paint, one on the tip of each boot (areas circled in green; click to enlarge the photo, if necessary). If you refer back to the first photo you can see the figure's boots quite easily.
By the way, did I forget to mention that I am painting these as Ultramarine Space Marines? Blue and white will be the primary colors used, which is why I might have been served better with a dark navy blue as the primer.

The Ultramarines have a lot of variations to their uniform, especially over the years. I've chosen to make the knee guards white, for several reasons.
1. The more contrasting colors – especially bright ones – that you can have from the primary color, the better. It will help make the figure stand out more.
2. The knee guards will serve as a guide as to where the paint for the lower leg guards go.
Use your spotter and paint two simple dots, one for each knee. Fortunately GW has enough detail for it to be picked out by the brush. Don't worry if you don't get it perfect; it will not really be noticeable except on close inspection.

As with the knee pads you should choose a contrasting color for the elbow guard. Next, using your spotter brush, paint a dot of white to represent the right elbow guard.

Now do the same for the left elbow guard.

Another customization point is the helmet. You can choose a contrasting color, the primary color, of a combination in order to denote special figures. In this case I decided to use white for the standard Tactical Space Marine, but you will see later that I use red for the Heavy Weapons Space Marine team.
To highlight the helmet it is two dots, one for the lower helmet and one for the upper. Do not make a single stroke. The two halves of the helmet are cast in, so if you paint it as two dots with a spotter brush the paint will not seep into the area where the eyes would be.
I did not make those triangle shapes, the brush did by following the raised areas of the casting. Use a light touch and don't overload the brush with paint. Also, using thinner paint is preferable, but not too thin. If it sticks and glops it is too thick. If it looks thin on the raised areas and freely flows into the recesses then the paint is too thin.

Believe it or not, those two "sticks" are the wings of the eagle, cast onto the chest plate. Make sure you do not load the brush heavily with paint and just barely wipe the brush against the raised area, rather than trying to spot paint it.

I don't know what this thing on the back of the pack is, but it stands out if you paint it a contrasting color. It is a great way to distinguish between units too, using a different color for each squad, platoon, or company (depending upon which level of game you are playing at).
A simple spot of paint will catch the raised area.

So here is where it starts to get tricky. Here is where you switch to a liner brush, or change how you use the Insane Detail brush.
When spot painting you were loading paint onto the tip and "pressing" the paint onto the raised area. To do lines – like the cast edging to the shoulder guards – you want to get paint onto the side of the brush. Then you run the side along the raised area. Trying to paint with the point runs the risk that you will press the tip somewhere other than the raised edge. By swiping with the side you decrease the chance of missing your target. It takes practice, but it is actually how you paint straight lines with a liner brush on larger figures too.

Here is the finished product. Don't worry about perfection, because the picture you see here is not what the typical eye sees. Deformities in the plastic, mold lines, and gritty pigment in the paint will all ensure that it will never be "perfect".

Although this step may look hard, it really isn't. Using the spotter dab the paint inside the area. Note that you want to leave some of the primer color between the white and blue! This produces an effect similar to blacklining and helps the contrast between the two colors stand out even more.
I really need to stress this part. The darker primer color is meant to show. Painting over too much primer is just as bad as if you painted over too much of another color; it is a mistake.

Using the knee guard and the boots as a guide, simply paint the area between them, leaving behind primer as a separator. The raised and recessed areas of the casting will make this easy for you.

The same applies for the sides. Here we are only painting the leg guards, so do not paint all the way up the legs.

Here is a picture of the painted leg guards from the back.

Now we do the legs. Paint a thin line above the leg guards leaving some primer to create the shadow of the gap behind the knees.
It sounds bad, but it really isn't.

Time to do their granny panties. Connect two quick two spots of paint and you are done.

Two more small dots of paint make a convincing pack. The bottom "ridge" is easy to pick out with a spotter brush. The top ridge takes a softer hand. Don't worry if you mess up; we just want color in the area.
Add a large spot of paint on the top. That way we will not have a large shadow on top.

Two small spots for the hands holding the bolter work fine. Easy to paint because the hands are cast as raised areas.

One stripe on the left represents the arm. Leave a gap between the arm and the elbow guard.
Notice that there is a strip above the arm, just below the shoulder guard. This is an chunk created by the mold not being able to have an undercut. It also makes the bolter sturdier from breakage. You can leave it the primer color and it will look fine.

Another big spot for the right arm. Again, leave primer between new spot and the elbow guard and the hand. You don't have to be exact; just paint the area between the two painted spots.

So now you can see what the Marines approximately look like without magnification. This is how they might look if you were holding them about a foot from your face. I know many people talk about not worrying about painting a lot of detail because the most common viewpoint is three or more feet from the figure, looking at it from above and behind. That said, I always inspect others' troops from one foot, so I fully expect others to do the same! I paint so it looks good from this distance.
Even though this was a really simple paint job – it was only three colors after all – I think the figure look very presentable. You can easily see what everything represents. People familiar with the Space Marines can tell what they are, even if they lack the emblems of their 32mm brethren.

Above you can see the unit before flocking (below, after flocking) at a distance where you would be looking at the table. You can discern the blues and the whites just pop. You can see the two halves of the helmet, and thus their "eyes" can be imagined. Any mistakes you made in the edging on the shoulder guards is just not discernable, but the detail absolutely pops off of the table and makes the figure. The heavy weapons team, with its red helmets and designator on their backpack, make them easy to pick out from the crowd. (The single figure is the Sergeant.)

In case you are wondering what rules I am using the answer is: I am not sure yet! The good thing about 6mm figures are that they are cheap enough, and quick enough to paint, that if you are not trying to get crazy with building huge armies for every game it is very doable to actually have figures painted and based for multiple systems. For example, I have these figures also painted and based singly, for 6mm skirmishing (see my battle report for In the Emperor's Name). That is going to be, maybe, 12 figures, per force type, per side. So, unless you have really extensive choices that is maybe 50-75 figures, which equates to about $20. Singly-based figures would also be usable for a Command & Colors type game where four single figures represents a unit.
These figures are to test out three company-level rules sets – Poor Bloody Infantry, Crossfire, and Five Core's Company Command – the first two of which I have had for quite some time and have wanted to play. Each stand can represent a portion of a squad (Poor Bloody Infantry) or the squad itself (Crossfire and Company Command). For Poor Bloody Infantry I would need about double or triple that to play a very basic game, while this represents the starter game for Crossfire and Company Command. (Guess which one will probably get played last?) So this basing scheme would probably require 36 figures per side for a starter force. Quadruple that to have some choices and you are looking at a $50 expenditure.
One of the reasons people look towards 6mm is reduce the space required for playing a game. I can understand that sentiment, given that I once lived full-time in an RV for more than three years. When I tell you that space was tight, I am not kidding. My typical gaming space was a standard 30" x 40" foam core board – an example of which can be seen here in one of my old 15mm DBAWI battle reports – so 6mm figures seem ideal for this. That said, I am one of those people that like to see figures a little more realistic to the ground scale. To be honest, that is one of factors that turned me off about Flames of War. The figure density on the table was just too high. It was not the number of units bought, but rather the number of figures on the small base sizes they used. I think that if I had played Flames of War with 6mm figures on 15mm base sizes I would have been much happier. (Tanks would have to be put on bases too, in order to ensure that they don't go tread-to-tread in an even smaller area, of course.) For me, now, that is why I keep coming back to 6mm: I use 15mm basing sizes and I find the figure density more aesthetically pleasing, at least for the modern era. Plus it is cheaper and I can paint the figures to an acceptable standard faster. That, and I can have figures based for multiple systems and not really fret over "wasting" figures.
Another aspect of 6mm aesthetics is proportionality. Most wargamer's pre-modern armies have their width to depth all wrong. Many rules acknowledge that by setting a unit's frontage to match a ground scale – for example saying that a battalion's real-world frontage is about 125 yards and setting the ground scale to 6" equals 125 yard, thus making the battalion's bases come out to a width of 6" – but the rules rarely reconcile that the unit's depth will be far greater in miniature than it real life. In the example scale, each inch would be about 21 yards, which would make a battalion about 1/2" in depth. Given than many pre-modern rules want double-ranked figures for aesthetic purposes, there is no way for them to fit, unless you are using the smaller scales.
Of course, another reason for 6mm is to get a "mass effect" by using large numbers of figures. I won't speak to that because: 1) I have never seen it implemented, so I have not been bitten by that bug; and 2) it sort of flies in the face all of my reasons above. Although I have 6mm for the Napoleonic and Franco-Prussian War periods, I do not feel that I have been really successful in using them in those periods. Maybe that is because I still have not settled on rules that I like, so I keep re-basing them?
Well, my goal was not to "sell" you on 6mm, but to address some of the common objections that I have personally heard and read online regarding this scale. It may not be the be-all, end-all scale for me, but certainly it serves its purpose. I believe it looks better than paper, top-down counters (like with board games), and when the figure counts are low and the ground scale large (such as with Memoir '44 and the like). Larger figures with very small buildings just don't look right ...
If you were thinking about 6mm, especially regarding painting them, I hope this helped. If you have a painting hand at all, the scale really won't matter. Just get a magnifier lamp (you should have one anyway), smaller brushes, and paint with good flow (I use Liquitex Flow Aid to thin acrylic paints) and give it a try. If you like Science Fiction, Onslaught Miniatures has a really nice line of figures where the details are cast on and these techniques work well. Sometimes you can find the old GW Epic figures on eBay pretty cheaply too. I have a ton of them still, which is why I turn to them to playtest out new modern game systems.
The next post I hope to show my other interest – also a holdover from my RV days – paper miniatures. I think LitkoAero may have finally come up with a sensible paper figure base that is far better than their previous paper counter stand. More on that when the bases arrive.

Nice work. I have ancients in 6mm and the key is not to spend too much time on them.
ReplyDelete